【云原生】Kubernetes网络管理实操

Kubernetes网络管理

文章目录

  • Kubernetes网络管理
    • 资源列表
    • 基础环境
    • 一、环境准备
      • 1.1、绑定映射关系
      • 1.2、安装常用软件
      • 1.3、关闭swap空间
      • 1.4、时间同步
    • 二、部署Docker环境
    • 三、部署Kuberenetes集群
      • 3.1、配置Kubernetes源
      • 3.2、安装Kubernetes所需工具
      • 3.3、生成配置文件拉取所需镜像
      • 3.4、master节点初始化
      • 3.5、node节点加入集群
      • 3.6、master节点查看集群状态
    • 四、部署Calico网络插件
      • 4.1、master上安装Calico网络插件
      • 4.2、查看Pod与Node
    • 五、Calico网络策略基础
      • 5.1、创建服务
      • 5.2、启动网络隔离
      • 5.3、测试网络隔离
      • 5.4、允许通过网络策略进行访问
    • 六、Calico网络策略进阶
      • 6.1、创建服务
      • 6.2、决绝所有入口流量
      • 6.3、允许进入Nginx的流量
      • 6.4、拒绝所有出口流量
      • 6.5、允许DNS出口流量
      • 6.6、允许出口流量到Nginx

资源列表

操作系统配置主机名IP
CentOS 7.92C4Gk8s-master192.168.93.101
CentOS 7.92C4Gk8s-node01192.168.93.102
CentOS 7.92C4Gk8s-node02192.168.93.103

基础环境

  • 关闭防火墙
systemctl stop firewalld
systemctl disable firewalld
  • 关闭内核安全机制
setenforce 0
sed -i "s/^SELINUX=.*/SELINUX=disabled/g" /etc/selinux/config
  • 修改主机名
hostnamectl set-hostname k8s-master
hostnamectl set-hostname k8s-node01
hostnamectl set-hostname k8s-node02

一、环境准备

  • 三台主机均要操作

1.1、绑定映射关系

[root@k8s-master ~]# cat >> /etc/hosts << EOF
192.168.93.101 k8s-master
192.168.93.102 k8s-node01
192.168.93.103 k8s-node02
EOF

1.2、安装常用软件

[root@k8s-master ~]# yum -y install vim wget net-tools lrzsz unzip

1.3、关闭swap空间

[root@k8s-master ~]# swapoff -a
[root@k8s-master ~]# sed -i '/swap/s/^/#/' /etc/fstab 
[root@k8s-master ~]# tail -1 /etc/fstab 
#/dev/mapper/centos-swap swap                    swap    defaults        0 0

1.4、时间同步

[root@k8s-node01 ~]# yum -y install ntpdate && ntpdate ntp.aliyun.com

二、部署Docker环境

  • 三台主机均要操作
[root@k8s-master ~]# yum -y install yum-utils device-mapper-persistent-data lvm2
[root@k8s-master ~]# yum-config-manager --add-repo https://mirrors.aliyun.com/docker-ce/linux/centos/docker-ce.repo
[root@k8s-master ~]# yum makecache fast


# 安装指定版本的Docker(k8s和Docker的版本有非常严格的要求)
[root@k8s-master ~]# yum -y install docker-ce-19.03.15 docker-ce-cli-19.03.15


# 使用以下命令永久开启和开启Docker
[root@k8s-master ~]# systemctl enable docker --now


# 配置镜像加速, 以下设置了cgroup驱动和阿里云加速器地址
[root@k8s-master ~]# vim /etc/docker/daemon.json
{  
  "exec-opts": ["native.cgroupdriver=systemd"],  
  "registry-mirrors": ["https://u9noolvn.mirror.aliyuncs.com"]  
}
[root@k8s-master ~]# systemctl daemon-reload 
[root@k8s-master ~]# systemctl restart docker


# 配置内核参数
[root@k8s-master ~]# cat >> /etc/sysctl.conf << EOF
net.bridge.bridge-nf-call-ip6tables = 1
net.bridge.bridge-nf-call-iptables = 1
net.ipv4.ip_forward = 1
EOF


# 往内核中加载模块
[root@k8s-master ~]# modprobe br_netfilter
[root@k8s-master ~]# sysctl -p

三、部署Kuberenetes集群

  • 准备好基础环境和Docker环境,下面就开始通过Kubeadm来部署Kubernetes集群。首先,三台主机安装Kubelet、Kubeadm、Kubectl
  • kubectl:命令行管理工具
  • kubeadm:安装K8S集群工具
  • kubelet:管理容器给工具

3.1、配置Kubernetes源

[root@k8s-master ~]# cat >> /etc/yum.repos.d/kubernetes.repo << EOF
[kubernetes]
name=Kubernetes
baseurl=https://mirrors.aliyun.com/kubernetes/yum/repos/kubernetes-el7-x86_64/  
enabled=1
gpgcheck=1
repo_gpgcheck=1
gpgkey=https://mirrors.aliyun.com/kubernetes/yum/doc/yum-key.gpg \
https://mirrors.aliyun.com/kubernetes/yum/doc/rpm-package-key.gpg
EOF
[root@k8s-master ~]# yum makecache fast

3.2、安装Kubernetes所需工具

# 列出k8s版本信息
[root@k8s-master ~]# yum list kubectl --showduplicates | sort -r


# 安装指定版本
[root@k8s-master ~]# yum install -y kubelet-1.18.0 kubeadm-1.18.0 kubectl-1.18.0


# 设置kubelet为开机自启动(不要开启服务)
[root@k8s-master ~]# systemctl enable kubelet.service 

3.3、生成配置文件拉取所需镜像

  • k8s-master节点操作
# 生成初始化配置文件
[root@k8s-master ~]# kubeadm config print init-defaults > init-config.yaml
W0620 08:25:39.895580    9287 configset.go:202] WARNING: kubeadm cannot validate component configs for API groups [kubelet.config.k8s.io kubeproxy.config.k8s.io]


[root@k8s-master ~]# vim init-config.yaml 
apiVersion: kubeadm.k8s.io/v1beta2
bootstrapTokens:
- groups:
  - system:bootstrappers:kubeadm:default-node-token
  token: abcdef.0123456789abcdef
  ttl: 24h0m0s
  usages:
  - signing
  - authentication
kind: InitConfiguration
localAPIEndpoint:
  advertiseAddress: 192.168.93.101   # master节点的IP地址
  bindPort: 6443
nodeRegistration:
  criSocket: /var/run/dockershim.sock
  name: k8s-master   # 如果使用域名保证可以解析,或直接使用IP地址
  taints:
  - effect: NoSchedule
    key: node-role.kubernetes.io/master
---
apiServer:
  timeoutForControlPlane: 4m0s
apiVersion: kubeadm.k8s.io/v1beta2
certificatesDir: /etc/kubernetes/pki
clusterName: kubernetes
controllerManager: {}
dns:
  type: CoreDNS
etcd:
  local:
    dataDir: /var/lib/etcd
imageRepository: registry.aliyuncs.com/google_containers  # 更改为阿里云镜像
kind: ClusterConfiguration
kubernetesVersion: v1.18.0
networking:
  dnsDomain: cluster.local
  serviceSubnet: 10.96.0.0/12
  podSubnet: 10.244.0.0/16   # podSubnet地址不能与主机物理地址设置为同一网段
scheduler: {}


# 查看所需镜像
[root@k8s-master ~]# kubeadm config images list --config init-config.yaml 
W0620 08:28:04.815219    9306 configset.go:202] WARNING: kubeadm cannot validate component configs for API groups [kubelet.config.k8s.io kubeproxy.config.k8s.io]
registry.aliyuncs.com/google_containers/kube-apiserver:v1.18.0
registry.aliyuncs.com/google_containers/kube-controller-manager:v1.18.0
registry.aliyuncs.com/google_containers/kube-scheduler:v1.18.0
registry.aliyuncs.com/google_containers/kube-proxy:v1.18.0
registry.aliyuncs.com/google_containers/pause:3.2
registry.aliyuncs.com/google_containers/etcd:3.4.3-0
registry.aliyuncs.com/google_containers/coredns:1.6.7


# 拉取所需镜像
[root@k8s-master ~]# kubeadm config images pull --config=init-config.yaml
W0620 08:28:38.237777    9312 configset.go:202] WARNING: kubeadm cannot validate component configs for API groups [kubelet.config.k8s.io kubeproxy.config.k8s.io]
[config/images] Pulled registry.aliyuncs.com/google_containers/kube-apiserver:v1.18.0
[config/images] Pulled registry.aliyuncs.com/google_containers/kube-controller-manager:v1.18.0
[config/images] Pulled registry.aliyuncs.com/google_containers/kube-scheduler:v1.18.0
[config/images] Pulled registry.aliyuncs.com/google_containers/kube-proxy:v1.18.0
[config/images] Pulled registry.aliyuncs.com/google_containers/pause:3.2
[config/images] Pulled registry.aliyuncs.com/google_containers/etcd:3.4.3-0
[config/images] Pulled registry.aliyuncs.com/google_containers/coredns:1.6.7

3.4、master节点初始化

[root@k8s-master ~]# kubeadm init --config=init-config.yaml
W0620 08:30:29.869197    9486 configset.go:202] WARNING: kubeadm cannot validate component configs for API groups [kubelet.config.k8s.io kubeproxy.config.k8s.io]
[init] Using Kubernetes version: v1.18.0
[preflight] Running pre-flight checks
[preflight] Pulling images required for setting up a Kubernetes cluster
[preflight] This might take a minute or two, depending on the speed of your internet connection
[preflight] You can also perform this action in beforehand using 'kubeadm config images pull'
[kubelet-start] Writing kubelet environment file with flags to file "/var/lib/kubelet/kubeadm-flags.env"
[kubelet-start] Writing kubelet configuration to file "/var/lib/kubelet/config.yaml"
[kubelet-start] Starting the kubelet
[certs] Using certificateDir folder "/etc/kubernetes/pki"
[certs] Generating "ca" certificate and key
[certs] Generating "apiserver" certificate and key
[certs] apiserver serving cert is signed for DNS names [k8s-master kubernetes kubernetes.default kubernetes.default.svc kubernetes.default.svc.cluster.local] and IPs [10.96.0.1 192.168.93.101]
[certs] Generating "apiserver-kubelet-client" certificate and key
[certs] Generating "front-proxy-ca" certificate and key
[certs] Generating "front-proxy-client" certificate and key
[certs] Generating "etcd/ca" certificate and key
[certs] Generating "etcd/server" certificate and key
[certs] etcd/server serving cert is signed for DNS names [k8s-master localhost] and IPs [192.168.93.101 127.0.0.1 ::1]
[certs] Generating "etcd/peer" certificate and key
[certs] etcd/peer serving cert is signed for DNS names [k8s-master localhost] and IPs [192.168.93.101 127.0.0.1 ::1]
[certs] Generating "etcd/healthcheck-client" certificate and key
[certs] Generating "apiserver-etcd-client" certificate and key
[certs] Generating "sa" key and public key
[kubeconfig] Using kubeconfig folder "/etc/kubernetes"
[kubeconfig] Writing "admin.conf" kubeconfig file
[kubeconfig] Writing "kubelet.conf" kubeconfig file
[kubeconfig] Writing "controller-manager.conf" kubeconfig file
[kubeconfig] Writing "scheduler.conf" kubeconfig file
[control-plane] Using manifest folder "/etc/kubernetes/manifests"
[control-plane] Creating static Pod manifest for "kube-apiserver"
[control-plane] Creating static Pod manifest for "kube-controller-manager"
W0620 08:30:32.099248    9486 manifests.go:225] the default kube-apiserver authorization-mode is "Node,RBAC"; using "Node,RBAC"
[control-plane] Creating static Pod manifest for "kube-scheduler"
W0620 08:30:32.100054    9486 manifests.go:225] the default kube-apiserver authorization-mode is "Node,RBAC"; using "Node,RBAC"
[etcd] Creating static Pod manifest for local etcd in "/etc/kubernetes/manifests"
[wait-control-plane] Waiting for the kubelet to boot up the control plane as static Pods from directory "/etc/kubernetes/manifests". This can take up to 4m0s
[apiclient] All control plane components are healthy after 15.002164 seconds
[upload-config] Storing the configuration used in ConfigMap "kubeadm-config" in the "kube-system" Namespace
[kubelet] Creating a ConfigMap "kubelet-config-1.18" in namespace kube-system with the configuration for the kubelets in the cluster
[upload-certs] Skipping phase. Please see --upload-certs
[mark-control-plane] Marking the node k8s-master as control-plane by adding the label "node-role.kubernetes.io/master=''"
[mark-control-plane] Marking the node k8s-master as control-plane by adding the taints [node-role.kubernetes.io/master:NoSchedule]
[bootstrap-token] Using token: abcdef.0123456789abcdef
[bootstrap-token] Configuring bootstrap tokens, cluster-info ConfigMap, RBAC Roles
[bootstrap-token] configured RBAC rules to allow Node Bootstrap tokens to get nodes
[bootstrap-token] configured RBAC rules to allow Node Bootstrap tokens to post CSRs in order for nodes to get long term certificate credentials
[bootstrap-token] configured RBAC rules to allow the csrapprover controller automatically approve CSRs from a Node Bootstrap Token
[bootstrap-token] configured RBAC rules to allow certificate rotation for all node client certificates in the cluster
[bootstrap-token] Creating the "cluster-info" ConfigMap in the "kube-public" namespace
[kubelet-finalize] Updating "/etc/kubernetes/kubelet.conf" to point to a rotatable kubelet client certificate and key
[addons] Applied essential addon: CoreDNS
[addons] Applied essential addon: kube-proxy

Your Kubernetes control-plane has initialized successfully!

To start using your cluster, you need to run the following as a regular user:
####################################################################
  mkdir -p $HOME/.kube
  sudo cp -i /etc/kubernetes/admin.conf $HOME/.kube/config
  sudo chown $(id -u):$(id -g) $HOME/.kube/config
####################################################################
You should now deploy a pod network to the cluster.
Run "kubectl apply -f [podnetwork].yaml" with one of the options listed at:
  https://kubernetes.io/docs/concepts/cluster-administration/addons/

Then you can join any number of worker nodes by running the following on each as root:
####################################################################
kubeadm join 192.168.93.101:6443 --token abcdef.0123456789abcdef \
    --discovery-token-ca-cert-hash sha256:9999ca93cd68cfa53f3da5773752e3faf182faa3ee5b429810c461b6f18ab742 
####################################################################


# master节点操作
[root@k8s-master ~]# mkdir -p $HOME/.kube
[root@k8s-master ~]# cp -i /etc/kubernetes/admin.conf $HOME/.kube/config
[root@k8s-master ~]# chown $(id -u):$(id -g) $HOME/.kube/config

3.5、node节点加入集群

[root@k8s-node01 ~]# kubeadm join 192.168.93.101:6443 --token abcdef.0123456789abcdef \
>     --discovery-token-ca-cert-hash sha256:9999ca93cd68cfa53f3da5773752e3faf182faa3ee5b429810c461b6f18ab742


[root@k8s-node02 ~]# kubeadm join 192.168.93.101:6443 --token abcdef.0123456789abcdef \
>     --discovery-token-ca-cert-hash sha256:9999ca93cd68cfa53f3da5773752e3faf182faa3ee5b429810c461b6f18ab742

3.6、master节点查看集群状态

[root@k8s-master ~]# kubectl get nodes
NAME         STATUS     ROLES    AGE     VERSION
k8s-master   NotReady   master   3m11s   v1.18.0
k8s-node01   NotReady   <none>   59s     v1.18.0
k8s-node02   NotReady   <none>   38s     v1.18.0

四、部署Calico网络插件

  • Calico网络插件是一种基于BGP的、纯三层的、容器间互通的网络方案。与Openstack、kubernetes、AWS、GCE等云平台都能够良好的集成。在虚拟化平台中,如Openstack、Docker等都需要实现workloads之间互联,但同时也需要对容器作隔离控制,就像在internet中的服务仅开放80端口、公有云的多租户一样,提供隔离和管控机制

4.1、master上安装Calico网络插件

[root@k8s-master ~]# kubectl apply -f calico.yaml 
configmap/calico-config created
customresourcedefinition.apiextensions.k8s.io/bgpconfigurations.crd.projectcalico.org created
customresourcedefinition.apiextensions.k8s.io/bgppeers.crd.projectcalico.org created
customresourcedefinition.apiextensions.k8s.io/blockaffinities.crd.projectcalico.org created
customresourcedefinition.apiextensions.k8s.io/caliconodestatuses.crd.projectcalico.org created
customresourcedefinition.apiextensions.k8s.io/clusterinformations.crd.projectcalico.org created
customresourcedefinition.apiextensions.k8s.io/felixconfigurations.crd.projectcalico.org created
customresourcedefinition.apiextensions.k8s.io/globalnetworkpolicies.crd.projectcalico.org created
customresourcedefinition.apiextensions.k8s.io/globalnetworksets.crd.projectcalico.org created
customresourcedefinition.apiextensions.k8s.io/hostendpoints.crd.projectcalico.org created
customresourcedefinition.apiextensions.k8s.io/ipamblocks.crd.projectcalico.org created
customresourcedefinition.apiextensions.k8s.io/ipamconfigs.crd.projectcalico.org created
customresourcedefinition.apiextensions.k8s.io/ipamhandles.crd.projectcalico.org created
customresourcedefinition.apiextensions.k8s.io/ippools.crd.projectcalico.org created
customresourcedefinition.apiextensions.k8s.io/ipreservations.crd.projectcalico.org created
customresourcedefinition.apiextensions.k8s.io/kubecontrollersconfigurations.crd.projectcalico.org created
customresourcedefinition.apiextensions.k8s.io/networkpolicies.crd.projectcalico.org created
customresourcedefinition.apiextensions.k8s.io/networksets.crd.projectcalico.org created
clusterrole.rbac.authorization.k8s.io/calico-kube-controllers created
clusterrolebinding.rbac.authorization.k8s.io/calico-kube-controllers created
clusterrole.rbac.authorization.k8s.io/calico-node created
clusterrolebinding.rbac.authorization.k8s.io/calico-node created
daemonset.apps/calico-node created
serviceaccount/calico-node created
deployment.apps/calico-kube-controllers created
serviceaccount/calico-kube-controllers created
poddisruptionbudget.policy/calico-kube-controllers created

4.2、查看Pod与Node

# 查看所有命名空间的Pod资源(必须所部是running)
[root@k8s-master ~]# kubectl get pod -A
NAMESPACE     NAME                                      READY   STATUS    RESTARTS   AGE
kube-system   calico-kube-controllers-858fbfbc9-vrlxn   0/1     Running   3          2m53s
kube-system   calico-node-qkvkz                         1/1     Running   0          2m53s
kube-system   calico-node-x54lm                         1/1     Running   0          2m53s
kube-system   calico-node-zbs6c                         1/1     Running   0          2m53s
kube-system   coredns-7ff77c879f-8pl9d                  0/1     Running   0          11m
kube-system   coredns-7ff77c879f-lmdk8                  0/1     Running   0          11m
kube-system   etcd-k8s-master                           1/1     Running   0          11m
kube-system   kube-apiserver-k8s-master                 1/1     Running   0          11m
kube-system   kube-controller-manager-k8s-master        1/1     Running   0          11m
kube-system   kube-proxy-758cc                          1/1     Running   0          9m47s
kube-system   kube-proxy-flvgv                          1/1     Running   0          9m26s
kube-system   kube-proxy-nwg7d                          1/1     Running   0          11m
kube-system   kube-scheduler-k8s-master                 1/1     Running   0          11m


# 查看node集群状态
[root@k8s-master ~]# kubectl get nodes
NAME         STATUS   ROLES    AGE   VERSION
k8s-master   Ready    master   12m   v1.18.0
k8s-node01   Ready    <none>   10m   v1.18.0
k8s-node02   Ready    <none>   10m   v1.18.0

五、Calico网络策略基础

5.1、创建服务

# 创建命名空间
[root@k8s-master ~]# kubectl create ns policy-demo
namespace/policy-demo created


# 在policy-demo命名空间中创建两个副本的Nginx Pod
[root@k8s-master ~]# kubectl run --namespace=policy-demo nginx --replicas=2 --image=nginx
Flag --replicas has been deprecated, has no effect and will be removed in the future.
pod/nginx created
# 若出现如上“Flag --replicas has been deprecated, has no effect and will be removed in the future.”报错,说明所使用的K8S是v1.18.0之前的版本,而K8S v1.18.0以后的版本中--replicas已经被启用,推荐使用Deployment创建Pods


# 创建刚刚所创建的pod
[root@k8s-master ~]# kubectl delete pod nginx -n policy-demo
pod "nginx" deleted


[root@k8s-master ~]# vim nginx-deployment.yaml
apiVersion: apps/v1
kind: Deployment
metadata:
  name: nginx
  namespace: policy-demo
  labels:
    app: nginx
spec:
  replicas: 2
  selector:
    matchLabels:
      app: nginx
  template:
    metadata:
      labels:
        app: nginx
    spec:
      containers:
      - name: nginx
        image: nginx
        ports:
        - containerPort: 80
[root@k8s-master ~]# kubectl apply -f nginx-deployment.yaml 
deployment.apps/nginx created


# 通过服务暴露Nginx的80端口
[root@k8s-master ~]# kubectl expose --namespace=policy-demo deployment nginx --port=80
service/nginx exposed
# 查询policy-demo命名空间中的所有资源
[root@k8s-master ~]# kubectl get all -n policy-demo
NAME                        READY   STATUS    RESTARTS   AGE
pod/nginx-d46f5678b-8c9br   1/1     Running   0          76s
pod/nginx-d46f5678b-rwkrr   1/1     Running   0          76s

NAME            TYPE        CLUSTER-IP      EXTERNAL-IP   PORT(S)   AGE
service/nginx   ClusterIP   10.102.145.27   <none>        80/TCP    45s

NAME                    READY   UP-TO-DATE   AVAILABLE   AGE
deployment.apps/nginx   2/2     2            2           76s

NAME                              DESIRED   CURRENT   READY   AGE
replicaset.apps/nginx-d46f5678b   2         2         2       76s


# 通过busybox的Pod去访问Nginx服务
[root@k8s-master ~]# kubectl run --namespace=policy-demo access --rm -it --image busybox /bin/sh
If you don't see a command prompt, try pressing enter.
/ # wget -q nginx -O -
<!DOCTYPE html>
<html>
<head>
<title>Welcome to nginx!</title>
<style>
html { color-scheme: light dark; }
body { width: 35em; margin: 0 auto;
font-family: Tahoma, Verdana, Arial, sans-serif; }
</style>
</head>
<body>
<h1>Welcome to nginx!</h1>
<p>If you see this page, the nginx web server is successfully installed and
working. Further configuration is required.</p>

<p>For online documentation and support please refer to
<a href="http://nginx.org/">nginx.org</a>.<br/>
Commercial support is available at
<a href="http://nginx.com/">nginx.com</a>.</p>

<p><em>Thank you for using nginx.</em></p>
</body>
</html>

5.2、启动网络隔离

  • 在policy-demo命名空间中打开开打隔离。然后Calico将阻止连接到该命名空间中的Pod。执行以下命令将创建一个NetworkPolicy,该策略将对policy-demo命名空间中的所有Pod实现默认的拒绝行为。
[root@k8s-master ~]# kubectl create -f - << EOF
kind: NetworkPolicy
apiVersion: networking.k8s.io/v1
metadata:
  name: default-deny
  namespace: policy-demo
spec:
  podSelector:
    matchLabels: {}
EOF
networkpolicy.networking.k8s.io/default-deny created

5.3、测试网络隔离

  • 启动网络隔离后,所有对Nginx服务的访问都将阻止。执行以下命令,尝试再次访问Nginx服务,查看网络隔离的效果
[root@k8s-master ~]# kubectl run --namespace=policy-demo access --rm -it --image busybox /bin/sh
If you don't see a command prompt, try pressing enter.
/ # wget -q --timeout=5 nginx -O -
wget: download timed out    # 连接超时

5.4、允许通过网络策略进行访问

  • 使用NetworkPolicy启用对Nginx服务的访问。设置允许从accessPod传入的连接,但不能从其他任何地方传入。创建access-nginx的网络策略具体内容如下所示
[root@k8s-master ~]# kubectl create -f - << EOF
apiVersion: networking.k8s.io/v1
kind: NetworkPolicy
metadata:
  name: access-nginx
  namespace: policy-demo
spec:
  podSelector:
    matchLabels:
      app: nginx
   ingress:
     - from:
       - podSelector:
           matchLabels:
             run: access
EOF
networkpolicy.networking.k8s.io/access-nginx created


# 从accessPod访问该服务
[root@k8s-master ~]# kubectl run --namespace=policy-demo access --rm -it --image busybox /bin/sh
If you don't see a command prompt, try pressing enter.
/ # wget -q --timeout=5 nginx -O -
<!DOCTYPE html>
<html>
<head>
<title>Welcome to nginx!</title>
<style>
html { color-scheme: light dark; }
body { width: 35em; margin: 0 auto;
font-family: Tahoma, Verdana, Arial, sans-serif; }
</style>
</head>
<body>
<h1>Welcome to nginx!</h1>
<p>If you see this page, the nginx web server is successfully installed and
working. Further configuration is required.</p>

<p>For online documentation and support please refer to
<a href="http://nginx.org/">nginx.org</a>.<br/>
Commercial support is available at
<a href="http://nginx.com/">nginx.com</a>.</p>

<p><em>Thank you for using nginx.</em></p>
</body>
</html>


# 如果没有标签run: access,仍然无法访问服务
[root@k8s-master ~]# kubectl run --namespace=policy-demo cant-access --rm -ti -image busybox /bin/sh
Error: unknown shorthand flag: 'm' in -mage
See 'kubectl run --help' for usage.
[root@k8s-master ~]# kubectl run --namespace=policy-demo cant-access --rm -ti --image busybox /bin/sh
If you don't see a command prompt, try pressing enter.
/ # wget -q --timeout=5 nginx -O -
wget: download timed out

六、Calico网络策略进阶

6.1、创建服务

  • 删除命名空间policy-demo。创建新的命名空间advanced-policy-demo
[root@k8s-master ~]# kubectl delete ns policy-demo
namespace "policy-demo" deleted
[root@k8s-master ~]# kubectl create ns advanced-policy-demo
namespace/advanced-policy-demo created


# 使用TAML文件创建Nginx服务
[root@k8s-master ~]# vim nginx-deployment.yaml 
apiVersion: apps/v1
kind: Deployment
metadata:
  name: nginx
  namespace: advanced-policy-demo
  labels:
    app: nginx
spec:
  replicas: 2
  selector:
    matchLabels:
      app: nginx
  template:
    metadata:
      labels:
        app: nginx
    spec:
      containers:
      - name: nginx
        image: nginx
        ports:
        - containerPort: 80
[root@k8s-master ~]# kubectl apply -f nginx-deployment.yaml 
deployment.apps/nginx created
[root@k8s-master ~]# kubectl expose --namespace=advanced-policy-demo deployment nginx --port=80
service/nginx exposed


# 验证访问权限并访问百度测试外网连通性
[root@k8s-master ~]# kubectl run --namespace=advanced-policy-demo access --rm -it --image busybox /bin/sh
If you don't see a command prompt, try pressing enter.
/ # wget -q --timeout=5 nginx -O -
<!DOCTYPE html>
<html>
<head>
<title>Welcome to nginx!</title>
<style>
html { color-scheme: light dark; }
body { width: 35em; margin: 0 auto;
font-family: Tahoma, Verdana, Arial, sans-serif; }
</style>
</head>
<body>
<h1>Welcome to nginx!</h1>
<p>If you see this page, the nginx web server is successfully installed and
working. Further configuration is required.</p>

<p>For online documentation and support please refer to
<a href="http://nginx.org/">nginx.org</a>.<br/>
Commercial support is available at
<a href="http://nginx.com/">nginx.com</a>.</p>

<p><em>Thank you for using nginx.</em></p>
</body>
</html>

/ # wget -q --time=5 www.baidu.com -O -
<!DOCTYPE html>
<!--STATUS OK--><html> <head><meta http-equiv=content-type content=text/html;charset=utf-8><meta http-equiv=X-UA-Compatible content=IE=Edge><meta content=always name=referrer><link rel=stylesheet type=text/css href=http://s1.bdstatic.com/r/www/cache/bdorz/baidu.min.css><title>百度一下,你就知道</title></head> <body link=#0000cc> <div id=wrapper> <div id=head> <div class=head_wrapper> <div class=s_form> <div class=s_form_wrapper> <div id=lg> <img hidefocus=true src=//www.baidu.com/img/bd_logo1.png width=270 height=129> </div> <form id=form name=f action=//www.baidu.com/s class=fm> <input type=hidden name=bdorz_come value=1> <input type=hidden name=ie value=utf-8> <input type=hidden name=f value=8> <input type=hidden name=rsv_bp value=1> <input type=hidden name=rsv_idx value=1> <input type=hidden name=tn value=baidu><span class="bg s_ipt_wr"><input id=kw name=wd class=s_ipt value maxlength=255 autocomplete=off autofocus></span><span class="bg s_btn_wr"><input type=submit id=su value=百度一下 class="bg s_btn"></span> </form> </div> </div> <div id=u1> <a href=http://news.baidu.com name=tj_trnews class=mnav>新闻</a> <a href=http://www.hao123.com name=tj_trhao123 class=mnav>hao123</a> <a href=http://map.baidu.com name=tj_trmap class=mnav>地图</a> <a href=http://v.baidu.com name=tj_trvideo class=mnav>视频</a> <a href=http://tieba.baidu.com name=tj_trtieba class=mnav>贴吧</a> <noscript> <a href=http://www.baidu.com/bdorz/login.gif?login&amp;tpl=mn&amp;u=http%3A%2F%2Fwww.baidu.com%2f%3fbdorz_come%3d1 name=tj_login class=lb>登录</a> </noscript> <script>document.write('<a href="http://www.baidu.com/bdorz/login.gif?login&tpl=mn&u='+ encodeURIComponent(window.location.href+ (window.location.search === "" ? "?" : "&")+ "bdorz_come=1")+ '" name="tj_login" class="lb">登录</a>');</script> <a href=//www.baidu.com/more/ name=tj_briicon class=bri style="display: block;">更多产品</a> </div> </div> </div> <div id=ftCon> <div id=ftConw> <p id=lh> <a href=http://home.baidu.com>关于百度</a> <a href=http://ir.baidu.com>About Baidu</a> </p> <p id=cp>&copy;2017&nbsp;Baidu&nbsp;<a href=http://www.baidu.com/duty/>使用百度前必读</a>&nbsp; <a href=http://jianyi.baidu.com/ class=cp-feedback>意见反馈</a>&nbsp;京ICP证030173号&nbsp; <img src=//www.baidu.com/img/gs.gif> </p> </div> </div> </div> </body> </html>

6.2、决绝所有入口流量

  • 设置网络策略,要求Nginx服务拒绝所有入口流量。然后在进行访问权限的验证
[root@k8s-master ~]# kubectl create -f - << EOF
apiVersion: networking.k8s.io/v1
kind: NetworkPolicy
metadata:
  name: default-deny-ingress
  namespace: advanced-policy-demo
spec:
  podSelector:
    matchLabels: {}
  policyTypes:
  - Ingress
EOF
networkpolicy.networking.k8s.io/default-deny-ingress created
[root@k8s-master ~]# kubectl run --namespace=advanced-policy-demo access --rm -it --image busybox /bin/sh
If you don't see a command prompt, try pressing enter.
/ # wget -q --timeout=5 nginx -O -
wget: download timed out
/ # wget -q --timeout=5 www.baidu.com -O -
<!DOCTYPE html>
<!--STATUS OK--><html> <head><meta http-equiv=content-type content=text/html;charset=utf-8><meta http-equiv=X-UA-Compatible content=IE=Edge><meta content=always name=referrer><link rel=stylesheet type=text/css href=http://s1.bdstatic.com/r/www/cache/bdorz/baidu.min.css><title>百度一下,你就知道</title></head> <body link=#0000cc> <div id=wrapper> <div id=head> <div class=head_wrapper> <div class=s_form> <div class=s_form_wrapper> <div id=lg> <img hidefocus=true src=//www.baidu.com/img/bd_logo1.png width=270 height=129> </div> <form id=form name=f action=//www.baidu.com/s class=fm> <input type=hidden name=bdorz_come value=1> <input type=hidden name=ie value=utf-8> <input type=hidden name=f value=8> <input type=hidden name=rsv_bp value=1> <input type=hidden name=rsv_idx value=1> <input type=hidden name=tn value=baidu><span class="bg s_ipt_wr"><input id=kw name=wd class=s_ipt value maxlength=255 autocomplete=off autofocus></span><span class="bg s_btn_wr"><input type=submit id=su value=百度一下 class="bg s_btn"></span> </form> </div> </div> <div id=u1> <a href=http://news.baidu.com name=tj_trnews class=mnav>新闻</a> <a href=http://www.hao123.com name=tj_trhao123 class=mnav>hao123</a> <a href=http://map.baidu.com name=tj_trmap class=mnav>地图</a> <a href=http://v.baidu.com name=tj_trvideo class=mnav>视频</a> <a href=http://tieba.baidu.com name=tj_trtieba class=mnav>贴吧</a> <noscript> <a href=http://www.baidu.com/bdorz/login.gif?login&amp;tpl=mn&amp;u=http%3A%2F%2Fwww.baidu.com%2f%3fbdorz_come%3d1 name=tj_login class=lb>登录</a> </noscript> <script>document.write('<a href="http://www.baidu.com/bdorz/login.gif?login&tpl=mn&u='+ encodeURIComponent(window.location.href+ (window.location.search === "" ? "?" : "&")+ "bdorz_come=1")+ '" name="tj_login" class="lb">登录</a>');</script> <a href=//www.baidu.com/more/ name=tj_briicon class=bri style="display: block;">更多产品</a> </div> </div> </div> <div id=ftCon> <div id=ftConw> <p id=lh> <a href=http://home.baidu.com>关于百度</a> <a href=http://ir.baidu.com>About Baidu</a> </p> <p id=cp>&copy;2017&nbsp;Baidu&nbsp;<a href=http://www.baidu.com/duty/>使用百度前必读</a>&nbsp; <a href=http://jianyi.baidu.com/ class=cp-feedback>意见反馈</a>&nbsp;京ICP证030173号&nbsp; <img src=//www.baidu.com/img/gs.gif> </p> </div> </div> </div> </body> </html>

# 上述命令执行结果中可以看出,对Nginx服务的入口访问被拒绝,而仍然允许对出战internet的出口访问

6.3、允许进入Nginx的流量

  • 执行以下命名,创建一个NetworkPolicy,设置允许流量从advanced-policy-demo命名空间中的任何Pod到Nginx Pod。创建策略成功后,就可以访问Nginx服务了
[root@k8s-master ~]# kubectl create -f - << EOF
apiVersion: networking.k8s.io/v1
kind: NetworkPolicy
metadata:
  name: access-nginx
  namespace: advanced-policy-demo
spec:
  podSelector:
    matchLabels:
      app: nginx
  ingress:
    - from:
      - podSelector:
          matchLabels: {}
EOF

networkpolicy.networking.k8s.io/access-nginx created
[root@k8s-master ~]# kubectl run --namespace=advanced-policy-demo access --rm -it --image busybox /bin/sh
If you don't see a command prompt, try pressing enter.
/ # wget -q --timeout=5 nginx -O -
<!DOCTYPE html>
<html>
<head>
<title>Welcome to nginx!</title>
<style>
html { color-scheme: light dark; }
body { width: 35em; margin: 0 auto;
font-family: Tahoma, Verdana, Arial, sans-serif; }
</style>
</head>
<body>
<h1>Welcome to nginx!</h1>
<p>If you see this page, the nginx web server is successfully installed and
working. Further configuration is required.</p>

<p>For online documentation and support please refer to
<a href="http://nginx.org/">nginx.org</a>.<br/>
Commercial support is available at
<a href="http://nginx.com/">nginx.com</a>.</p>

<p><em>Thank you for using nginx.</em></p>
</body>
</html>
/ # 

6.4、拒绝所有出口流量

  • 设置拒绝所有出口流量的网络策略,该策略设置成功后,任何策略未明确允许的入站或出战流量都将被拒绝
[root@k8s-master ~]# kubectl create -f - << EOF
apiVersion: networking.k8s.io/v1
kind: NetworkPolicy
metadata:
  name: default-deny-egress
  namespace: advanced-policy-demo
spec:
  podSelector:
    matchLabels: {}
  policyTypes:
  - Egress
EOF
networkpolicy.networking.k8s.io/default-deny-egress created
[root@k8s-master ~]# kubectl run --namespace=advanced-policy-demo access --rm -it --image busybox /bin/sh
If you don't see a command prompt, try pressing enter.
/ # nslookup nginx
;; connection timed out; no servers could be reached

/ # wget -q --timeout=5 www.baidu.com -O -
wget: bad address 'www.baidu.com'

6.5、允许DNS出口流量

  • 执行以下命令,在kube-system名称空间上创建一个标签。该标签的NetworkPolicy允许DNS从advanced-policy-demo名称空间中的任何Pod到名称空间kube-system的出站流量
[root@k8s-master ~]# kubectl label namespace kube-system name=kube-system
namespace/kube-system labeled
[root@k8s-master ~]# kubectl create -f - << EOF
apiVersion: networking.k8s.io/v1
kind: NetworkPolicy
metadata:
  name: allow-dns-access
  namespace: advanced-policy-demo
spec:
  podSelector:
    matchLabels: {}
  policyTypes:
  - Egress
  egress:
  - to:
    - namespaceSelector:
        matchLabels:
          name: kube-system
    ports:
    - protocol: UDP
      port: 53
EOF
networkpolicy.networking.k8s.io/allow-dns-access created
[root@k8s-master ~]# kubectl run --namespace=advanced-policy-demo access --rm -it --image busybox /bin/sh
If you don't see a command prompt, try pressing enter.
/ # nslookup nginx
Server:		10.96.0.10
Address:	10.96.0.10:53

** server can't find nginx.advanced-policy-demo.svc.cluster.local: NXDOMAIN

*** Can't find nginx.svc.cluster.local: No answer
*** Can't find nginx.cluster.local: No answer
*** Can't find nginx.advanced-policy-demo.svc.cluster.local: No answer
*** Can't find nginx.svc.cluster.local: No answer
*** Can't find nginx.cluster.local: No answer

/ # nslookup www.baidu.com
Server:		10.96.0.10
Address:	10.96.0.10:53

Non-authoritative answer:
www.baidu.com	canonical name = www.a.shifen.com
Name:	www.a.shifen.com
Address: 2408:871a:2100:2:0:ff:b09f:237
Name:	www.a.shifen.com
Address: 2408:871a:2100:3:0:ff:b025:348d

*** Can't find www.baidu.com: No answer

# 即使DNS出口流量被允许,但来自Advanced-policy-demo命名空间中的所有Pod的所有其他出口流量仍被阻止。因此,来自wget调用的HTTP出口流量仍将失败
/ # wget -q --timeout=5 nginx -O -
wget: download timed out

6.6、允许出口流量到Nginx

  • 执行以下命令,创建一个NetworkPolicy,允许从advanced-policy-demo命名空间中的任务Pod到具有app: nginx相同名称空间中标签匹配的Pod的出战流量
[root@k8s-master ~]# kubectl create -f - << EOF
apiVersion: networking.k8s.io/v1
kind: NetworkPolicy
metadata:
  name: allow-egress-to-advance-policy-ns
  namespace: advanced-policy-demo
spec:
  podSelector: {}
  policyTypes:
  - Egress
  egress:
  - to:
    - podSelector:
        matchLabels:
          app: nginx
EOF
networkpolicy.networking.k8s.io/allow-egress-to-advance-policy-ns created
[root@k8s-master ~]# kubectl run --namespace=advanced-policy-demo access --rm -it --image busybox /bin/sh
If you don't see a command prompt, try pressing enter.
/ # wget -q --timeout=5 nginx -O -
<!DOCTYPE html>
<html>
<head>
<title>Welcome to nginx!</title>
<style>
html { color-scheme: light dark; }
body { width: 35em; margin: 0 auto;
font-family: Tahoma, Verdana, Arial, sans-serif; }
</style>
</head>
<body>
<h1>Welcome to nginx!</h1>
<p>If you see this page, the nginx web server is successfully installed and
working. Further configuration is required.</p>

<p>For online documentation and support please refer to
<a href="http://nginx.org/">nginx.org</a>.<br/>
Commercial support is available at
<a href="http://nginx.com/">nginx.com</a>.</p>

<p><em>Thank you for using nginx.</em></p>
</body>
</html>
/ # wget -q --timeout=5 www.baidu.com -O -
wget: download timed out

# 访问百度超时,是因为它可以解决DNS匹配标签的以外的其他任何出口访问app: nginx的advanced-policy-demo命名空间
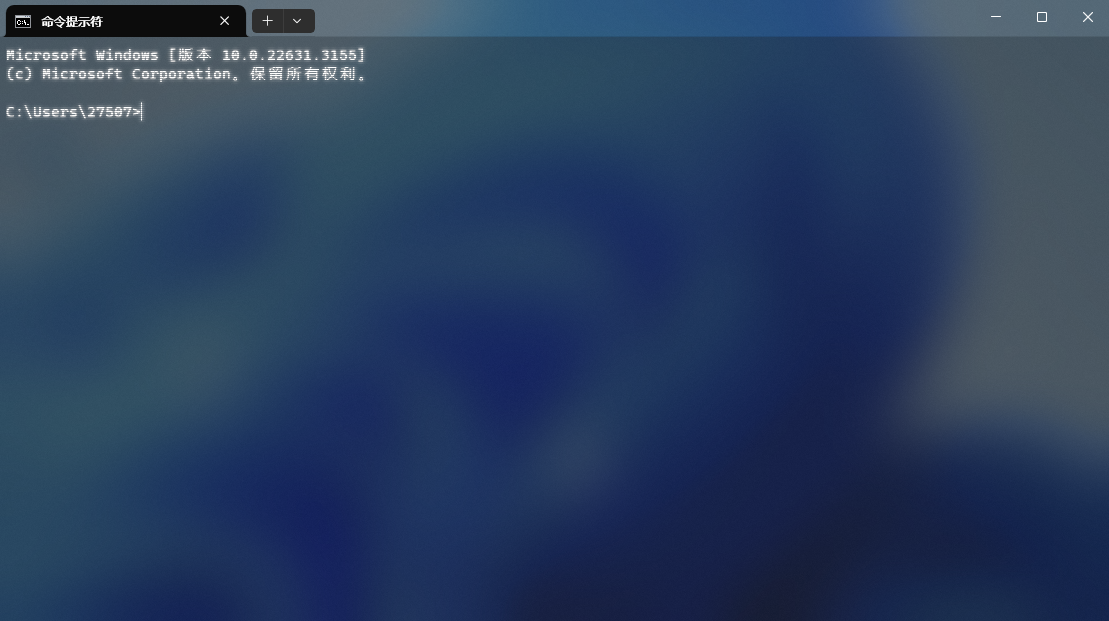
本文来自互联网用户投稿,该文观点仅代表作者本人,不代表本站立场。本站仅提供信息存储空间服务,不拥有所有权,不承担相关法律责任。如若转载,请注明出处:http://www.mfbz.cn/a/740066.html

如若内容造成侵权/违法违规/事实不符,请联系我们进行投诉反馈qq邮箱809451989@qq.com,一经查实,立即删除!

相关文章

PingCAP 再度入选“中国独角兽企业”,数据库领域的先锋力量

6月16日&#xff0c;2024中国&#xff08;重庆&#xff09;独角兽企业大会上&#xff0c;长城战略咨询发布了《中国独角兽企业研究报告2024》。 2023年&#xff0c;中国独角兽企业共375家&#xff0c;大数据赛道共5家。 估值排序企业名称2023年估值&#xff08;亿美元&#xff…

dp经典问题:LCS问题

dp&#xff1a;LCS问题 最长公共子序列&#xff08;Longest Common Subsequence, LCS&#xff09;问题 是寻找两个字符串中最长的子序列&#xff0c;使得这个子序列在两个字符串中出现的相对顺序保持一致&#xff0c;但不要求连续。 力扣原题链接 1.定义 给定两个字符串 S1…

猫狗识别—视频识别

猫狗识别—视频识别 1. 导入所需的库&#xff1a;2. 创建Tkinter主窗口并设置标题&#xff1a;3. 设置窗口的宽度和高度&#xff1a;4. 创建一个Canvas&#xff0c;它将用于显示视频帧&#xff1a;5. 初始化一个视频流变量cap&#xff0c;用于存储OpenCV的视频捕获对象&#xf…

期末考试的成绩怎么发?

随着学期末的临近&#xff0c;我们又迎来了向家长通报学生成绩的关键时刻。下面是一份成绩群发的全新指南&#xff0c;让我们一起高效而温馨地完成这项任务&#xff01; 1.选择沟通渠道&#xff1a; - 邮件与短信各有优势。邮件更适合提供详尽的成绩分析和评语&#xff0c;而短…

某同盾验证码

⚠️前言⚠️ 本文仅用于学术交流。 学习探讨逆向知识&#xff0c;欢迎私信共享学习心得。 如有侵权&#xff0c;联系博主删除。 请勿商用&#xff0c;否则后果自负。 网址 aHR0cHM6Ly9zZWMueGlhb2R1bi5jb20vb25saW5lRXhwZXJpZW5jZS9zbGlkaW5nUHV6emxl 1. 先整体分析一下接…

计算机组成原理 | 数据的表示、运算和校验(4)基本运算方法

补码加减&#xff08;运算与控制&#xff09; (-Y)补 [Y补]变补&#xff0c;这个要好好理解 (-Y)补&#xff1a;先将Y的符号位置反&#xff0c;在求-Y的补码&#xff08;数字为变反加1&#xff09; [Y补]变补&#xff1a;先求Y的补码&#xff08;数字为变反加1&#xff09;&…

shell的正则表达------awk

一、awk&#xff1a;按行取列 1.awk原理&#xff1a;根据指令信息&#xff0c;逐行的读取文本内容&#xff0c;然后按照条件进行格式化输出。 2.awk默认分隔符&#xff1a;空格、tab键&#xff0c;把多个空格自动压缩成一个。 3.awk的选项&#xff1a; awk ‘操作符 {动作}’…

微服务、多租户、单点登录、国产化形成的开源Java框架!

一、项目简介 JVS是软开企服构建的一站式数字化的开源框架&#xff0c;支持对接多种账户体系&#xff0c;支持多租户、支持Auth2、统一登录、单点登录等&#xff0c;支持原生开发、低代码/零代码开发应用。 二、框架核心功能 控制台(首页)&#xff1a;采用配置化的方式 用户…

Redis数据库(一):Redis数据库介绍与安装

Redis是一种高性能的开源内存数据库&#xff0c;支持多种数据结构&#xff08;如字符串、列表、集合等&#xff09;&#xff0c;具有快速的读写速度。它提供持久化、主从复制、高可用性和分布式部署等功能&#xff0c;适用于缓存、实时分析、消息队列等应用场景。Redis使用简单…

A股羊群效应CSSD CSAD数据与Stata代码数据(2000-2023)

数据来源 参考马丽老师&#xff08;2016&#xff09;的做法&#xff0c;股价数据来源于东方财富网&#xff0c;采用上证180指数及构成上证180指数样本股日收盘价数据作为样本。上证180指数自2002年7月1日起正式发布&#xff0c;其样本股是在所有 A 股股票中抽取最具市场代表性…

什么是绩效评价?绩效考核的五个标准包括哪些?

什么是绩效评价&#xff1f;绩效评价是指运用一定的评价方法、量化指标及评价标准&#xff0c;对中央部门为实现其职能所确定的绩效目标的实现程度&#xff0c;及为实现这一目标所安排预算的执行结果所进行的综合性评价。   绩效考核的五个标准有&#xff1a; 1、考核标准设置…

记一下 Stream 流操作

Java Stream流 创建流 Collection.stream() / Collection.parallelStream()&#xff1a;从集合生成流&#xff0c;后者为并行流。 List<String> list new ArrayList<>(); Stream<String> stream list.stream(); //获取一个顺序流 Stream<String> …

深度学习 --- stanford cs231学习笔记五(训练神经网络的几个重要组成部分之三,权重矩阵的初始化)

权重矩阵的初始化 3&#xff0c;权重矩阵的初始化 深度学习所学习的重点就是要根据损失函数训练权重矩阵中的系数。即便如此&#xff0c;权重函数也不能为空&#xff0c;总是需要初始化为某个值。 3&#xff0c;1 全都初始化为同一个常数可以吗&#xff1f; 首先要简单回顾一下…

【总线】AXI4第五课时:信号描述

大家好,欢迎来到今天的总线学习时间!如果你对电子设计、特别是FPGA和SoC设计感兴趣&#xff0c;那你绝对不能错过我们今天的主角——AXI4总线。作为ARM公司AMBA总线家族中的佼佼者&#xff0c;AXI4以其高性能和高度可扩展性&#xff0c;成为了现代电子系统中不可或缺的通信桥梁…

保姆级 | Windows 复古风格终端样式设置

0x00 前言 前段时间有朋友询问我 Windows 终端的样式是如何设置的&#xff0c;我也进行了一些简单的回复。在之前的 Windows 11 版本中&#xff0c;系统提供了一个界面按钮&#xff0c;可以直接将终端样式设置为复古风格。然而&#xff0c;系统更新之后&#xff0c;这个按钮好像…

【UML用户指南】-22-对高级行为建模-事件和信号

目录 1、概述 2、事件分类 2.1、信号 2.2、调用事件 2.3、时间事件和变化事件 2.4、发送和接收事件 3、常用建模技术 3.1、对信号族建模 3.1.1、建立过程 3.2、对异常建模 在状态机语境中&#xff0c;使用事件对能够触发状态转移的激励建模。事件包括信号、调用、时间…

go语言day03

目录 一、 go语言的数据类型&#xff1a; 二、声明赋值的简写形式&#xff1a; ":" 1&#xff09;重复使用的编译错误 2&#xff09;在全局变量中使用 : 会报编译错误 三、变量规则&#xff1a; 0&#xff09;变量的命名规则&#xff1a; 1&#xff09;创建的局部…

Excel 宏录制与VBA编程 —— 12、文本字符串类型相关(附示例)

字符串分割&#xff0c;文末示例&#xff08;文末代码3附有源码&#xff09; 代码1 - 基础字符串 代码2 - 字符串拆分 代码3 - 字符串分割 Option ExplicitSub WorkbooksClear()Dim DataRange As RangeSet DataRange Range("C2:E12")DataRange.Clear End SubSub Wo…

PS添加物体阴影

一、选择背景&#xff0c;确保物体和北京分割出图层 二、右键单击物体图层&#xff0c;点击混合选项&#xff0c;点击投影 三、调整参数&#xff0c;可以看效果决定(距离是高度&#xff0c;扩展是浓度&#xff0c;大小是模糊程度)&#xff0c;保存即可

PhotoShop自动生成号码牌文件

1、说明 设计卡牌的时候&#xff0c;遇到自动生成编号&#xff0c;从01500到-02500&#xff0c;一个一个的手写&#xff0c;在存储保存成psd格式的文件&#xff0c;会很耗时。 下面将介绍如何使用ps自动生成psd格式的文件 2、使用excle生成数字 从01500到-02500 第一步&…